
Blog
Ramps for Sheds: The Complete Guide to Choosing and Building the Right Shed Ramp in 2026

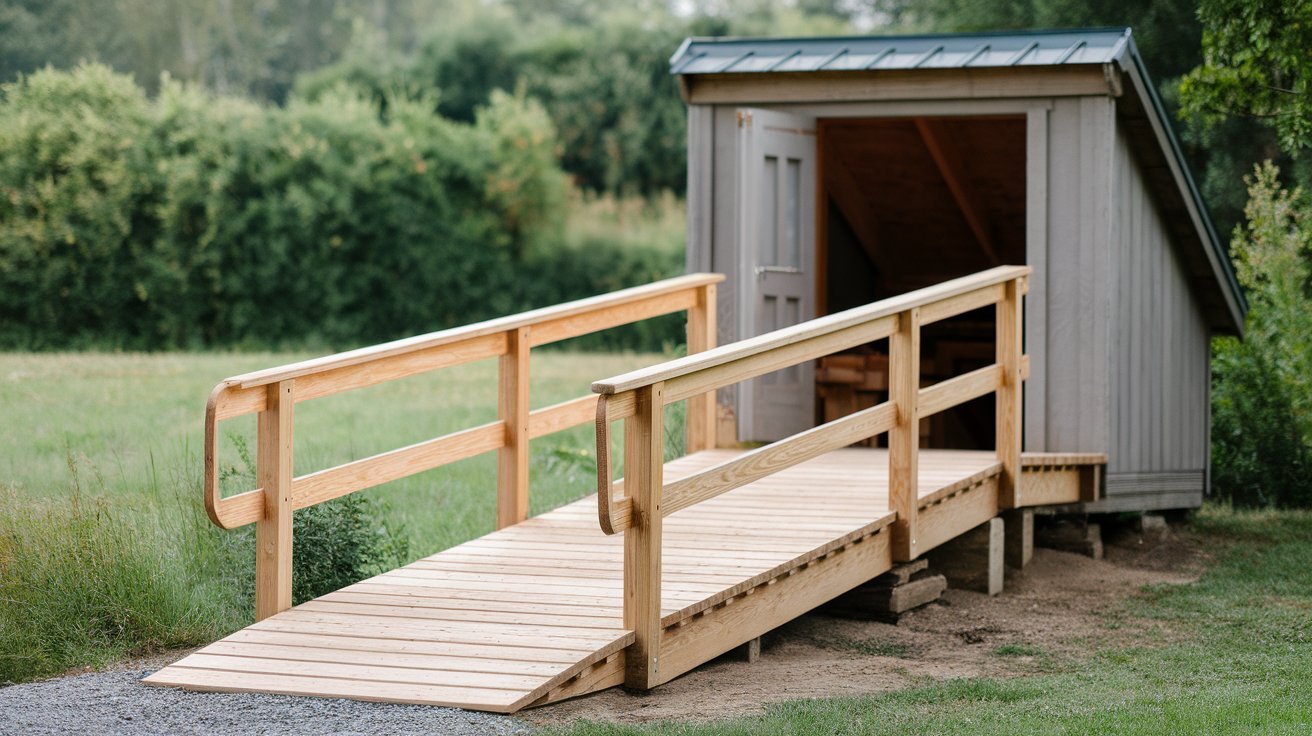
A shed is useful for storing lawn mowers, wheelbarrows, bicycles, garden equipment, tools, and outdoor machinery, but getting heavy equipment in and out can become difficult when the shed floor sits above ground level. This is where ramps for sheds provide a simple and practical solution.
A properly designed shed ramp creates a smooth transition between the ground and shed entrance. It can make loading equipment easier, reduce the risk of trips and falls, and improve the overall usability of your shed. In 2026, homeowners can choose from wooden shed ramps, metal ramps, composite options, portable ramps, and custom-built designs.
Whether we are replacing an old ramp or installing one for a new shed, understanding the correct slope, materials, weight capacity, and installation method helps us build a safer and more durable entry.
What Are Ramps for Sheds and Why Do We Need One?
Shed ramps are inclined platforms installed at a shed doorway to connect the ground with a raised shed floor. Many sheds have floors several inches above the surrounding ground to protect stored belongings from moisture and improve drainage. Unfortunately, this height difference can make it challenging to move equipment inside.
A ramp eliminates much of that difficulty by creating a gradual incline. Instead of lifting a heavy mower or pushing equipment over a sharp edge, we can guide it smoothly into the shed.
A good ramp is particularly useful for:
- Push and riding lawn mowers
- Wheelbarrows and garden carts
- Snow blowers
- Motorcycles and bicycles
- Hand trucks and dollies
- Heavy storage boxes
- Gardening equipment
- Small utility equipment
A ramp can also improve accessibility when designed with an appropriate slope and surface. The exact slope needed depends on the equipment, available space, and applicable local requirements.
How to Choose the Right Shed Ramp
Before buying or building a ramp, we should consider several important factors. The first is the height of the shed floor. Measure from the ground directly outside the entrance to the top surface of the shed floor. This measurement determines how long the ramp should be.
The second consideration is weight capacity. A lightweight garden tool may require only a basic ramp, while a riding mower or motorcycle needs a substantially stronger structure.
We should also measure the door opening width. A ramp should generally provide enough width for equipment to pass comfortably without forcing the wheels close to the edges.
The intended use matters as well. A ramp for occasional wheelbarrow use can be different from a ramp that supports a heavy mower several times a week.
Finally, consider the environment. Areas exposed to rain, snow, or high humidity require weather-resistant materials and proper drainage.
What Is the Best Slope for a Shed Ramp?
One of the most important decisions when building ramps for sheds is determining the slope.
A ramp that is too steep can make pushing or driving equipment difficult and can increase the possibility of losing control. A longer, gentler ramp generally provides easier access.
We can calculate the slope using the rise and run:
Slope = vertical rise ÷ horizontal run
For example, if a shed floor is 12 inches above the ground and the ramp extends 72 inches outward, the ratio is 1:6. A 1:6 slope means the ramp rises one unit for every six units of horizontal distance.
For heavy equipment, a gentler slope is generally preferable. We should always consider the equipment manufacturer’s recommendations and local building or accessibility requirements rather than relying on one universal slope.
Remember that a ramp needs sufficient horizontal clearance. If the shed entrance is high, trying to make the ramp extremely short can result in an unnecessarily steep incline.
Best Materials for Building Shed Ramps
We have several material choices when constructing a shed ramp, and each offers different advantages.
Pressure-Treated Wood
Pressure-treated lumber is one of the most popular choices because it is relatively affordable, strong, and easy to work with. It can be used to create a framed ramp with supporting joists and a durable surface.
Wood should be properly supported and protected from prolonged moisture exposure. The ramp should also be designed so water does not remain trapped against the shed structure.
Metal
Metal shed ramps are another excellent option, particularly for heavy equipment. Aluminum ramps are relatively lightweight and naturally resistant to corrosion, while steel can provide substantial strength.
Metal ramps are often available as portable or folding ramps, making them useful when we do not want to permanently attach a structure to the shed.
Composite Materials
Composite decking and similar materials can provide good weather resistance and reduced maintenance. They can be attractive for homeowners who want a ramp that matches an existing deck or outdoor structure.
However, we should verify the material’s structural capacity before using it as the primary load-bearing surface.
How to Build a Wooden Ramp for a Shed
Building a basic wooden shed ramp starts with accurate measurements and a strong supporting frame.
First, measure the shed floor height and determine an appropriate ramp length. Next, plan the width based on the equipment that will use the ramp.
We then construct the ramp’s supporting frame using appropriately sized structural lumber. The supports should be positioned to prevent excessive flexing under the expected load.
After creating the frame, attach a suitable ramp surface. Exterior-rated screws or fasteners should be used rather than indoor hardware.
The surface should also provide sufficient traction. Adding appropriately designed anti-slip strips or a textured ramp surface can improve grip, especially during wet weather.
At the shed end, the ramp should transition securely to the floor without creating a dangerous lip. At the ground end, it should sit firmly and remain stable when equipment passes over it.
Before regular use, test the ramp with a light load and inspect it for movement, bending, loose fasteners, or unstable supports.
How to Make a Shed Ramp Safe and Durable
A ramp’s usefulness depends heavily on its stability and traction. Even a strong ramp can become hazardous if it shifts or becomes slippery.
We should ensure that the ramp is securely attached or positioned so it cannot slide away from the shed. The supporting structure should be capable of handling the maximum expected load, including the equipment and operator when applicable.
A non-slip surface is especially important in areas that receive rain or snow. However, the traction material should not create an obstruction that catches wheels.
Regular maintenance also extends the ramp’s life. With wooden ramps, inspect regularly for:
- Rot or soft spots
- Cracked boards
- Loose screws
- Warped lumber
- Splintering
- Structural movement
For metal ramps, check for corrosion, bent sections, damaged hinges, and loose hardware.
Keeping leaves, mud, snow, and debris off the ramp also helps maintain traction.
Portable vs. Permanent Shed Ramps
The choice between a portable shed ramp and a permanent ramp depends on how we use the shed.
Portable ramps are convenient when we need occasional access or want the flexibility to remove the ramp. Folding aluminum ramps can also be stored when they are not needed.
Permanent ramps are better when equipment moves in and out frequently. A fixed wooden ramp can become part of the shed entrance and provide a stable, convenient path for everyday use.
For homeowners who frequently move a riding mower, garden tractor, or other heavy equipment, a strong permanent ramp is usually more convenient than repeatedly positioning a portable model.
Common Mistakes to Avoid When Installing Shed Ramps
Several mistakes can reduce the safety and lifespan of a shed ramp.
The most common is making the ramp too steep. A short ramp may seem convenient because it saves space, but excessive slope can make heavy equipment difficult to control.
Another mistake is underestimating the required weight capacity. We should select structural components based on the heaviest equipment that will use the ramp rather than the lightest item.
Poor drainage is another concern. Water collecting around a wooden ramp can accelerate deterioration and may contribute to problems around the shed floor.
We should also avoid using smooth, slippery materials without adequate traction. A ramp that works well in dry weather may become hazardous when wet.
Finally, do not skip routine inspections. Small problems such as loose fasteners or damaged boards can become major safety issues if ignored.
Conclusion: Choosing the Best Ramps for Sheds in 2026
The right ramp for shed can transform an inconvenient raised doorway into an easy-to-use entrance. Whether we choose a pressure-treated wooden ramp, aluminum ramp, metal design, composite surface, or portable solution, the most important factors are proper slope, structural strength, width, traction, stability, and weather resistance.
Before installation, we should measure the shed floor height, identify the heaviest equipment that will use the ramp, calculate an appropriate ramp length, and choose materials suitable for outdoor conditions. A well-built ramp should provide a smooth, stable, and durable transition while making everyday shed access significantly easier.
With careful planning and regular maintenance, a quality shed ramp can last for years and make everything from moving a lawn mower to storing garden equipment much more convenient.

Cobblestone farming is one of the most useful resource-generation methods in Minecraft. A well-built cobblestone generator allows us to produce a renewable supply of cobblestone without repeatedly searching through caves or digging large underground areas.
The basic idea is remarkably simple: we combine water and lava in a controlled arrangement so that cobblestone forms at a predictable location. Minecraft’s official material explains that lava can produce cobblestone, stone, or obsidian when it interacts with water, depending on the circumstances.
In 2026, cobblestone farming remains particularly useful for Survival, Skyblock, building projects, redstone projects and resource-heavy worlds. From a tiny manual generator to a sophisticated piston-based farm, we can scale the design according to our needs.
What Is Cobblestone Farming in Minecraft?
Cobblestone farming is the process of repeatedly generating cobblestone through Minecraft’s water-and-lava mechanics.
Normally, we obtain cobblestone by mining stone with a pickaxe. Minecraft’s official guide notes that breaking stone with a normal pickaxe produces cobblestone, while a Silk Touch pickaxe is required when we specifically want the stone block itself.
A cobblestone generator provides an alternative. Instead of looking for naturally generated stone, we create a small controlled environment where lava and water interact to produce new blocks. We then mine the generated cobblestone and allow the process to repeat.
This is why the technique is especially powerful early in a world. We can establish a renewable source with only a handful of basic materials.
How the Cobblestone Generator Works
The most important part of a successful farm is understanding fluid positioning.
We need to arrange water and lava so that they interact at the intended generation point. When the conditions are correct, the resulting block can be mined and generated again.
The exact behavior depends on how the fluids meet. We therefore should not simply pour water directly over a lava pool and expect every interaction to produce cobblestone. Different arrangements can produce different blocks.
Minecraft’s official documentation specifically notes that lava interacting with water can create infinite cobblestone, while other circumstances can result in finite quantities of stone or obsidian.
This makes careful construction important. A good generator keeps the lava source protected, gives water a controlled path and places the cobblestone generation point where we can safely reach it.
How to Build a Simple Cobblestone Farm
A basic manual generator does not require complicated redstone.
We generally need:
- 1 water bucket
- 1 lava bucket
- Several building blocks
- 1 pickaxe
- A safe area for the generator
We begin by creating a small trench or channel. The building blocks are arranged to control where water and lava flow. Water is placed on one side, while lava is positioned so its flow reaches the intended meeting point.
Once the arrangement is correct, cobblestone forms at the generation point.
We can then stand safely beside the generator, mine the cobblestone and repeat the process. The design is inexpensive and can be expanded later.
Safety deserves special attention. Lava can damage players and ignite nearby flammable materials. Minecraft’s official information warns that lava is dangerous to players and can also set flammable blocks on fire.
For that reason, we should surround the generator with nonflammable blocks and avoid standing directly beside an exposed lava source.
Manual vs. Automatic Cobblestone Farming
There are two broad approaches to cobblestone farming: manual and automated.
A manual cobblestone generator is ideal for beginners. We mine the generated block ourselves, and the generator immediately provides another block. There is no requirement for complicated redstone, pistons or expensive materials.
For larger projects, however, manual mining can become repetitive. This is where automation becomes useful.
Advanced designs can incorporate pistons, observers, redstone circuits and collection systems. Pistons can move newly generated blocks away from the formation point, allowing the generator to continue producing material. Redstone components can be used to control the timing of the mechanism.
We should distinguish between a farm that automatically moves blocks and one that actually automatically breaks and collects cobblestone. A piston-based design may still require player interaction unless additional machinery is included.
For most Survival players, a simple manual generator is often enough. For large-scale builders and technical players, automation can make the system considerably more productive.
Best Uses for Farmed Cobblestone
The biggest advantage of cobblestone farming is the sheer number of ways we can use the material.
Cobblestone is an important building block. We can use it for foundations, walls, towers, bridges, paths, underground bases and decorative structures. Its rough gray appearance also combines well with stone, mossy blocks, deepslate, wood and other building materials.
Cobblestone is also useful for crafting. It is required for several basic Minecraft recipes and remains an important early-game resource.
Another valuable option is converting cobblestone into stone through smelting. Minecraft’s official guide confirms that placing cobblestone in a furnace turns it back into stone.
This creates a useful production chain:
Cobblestone generator → Cobblestone → Furnace → Stone
For large construction projects, this can save significant amounts of mining time.
Cobblestone farming is particularly valuable in Skyblock-style gameplay, where normal underground resources may be extremely limited. A reliable generator can become one of the first major infrastructure projects on an island.
How to Make Cobblestone Farming More Efficient
Once our basic generator works, we can improve it gradually.
First, we should make the mining position comfortable and safe. The player should be able to reach the generated block without accidentally stepping into lava.
Second, we can improve our pickaxe. A durable pickaxe means less interruption during extended farming sessions. Efficiency can also make repeated mining faster, while Unbreaking can reduce durability consumption.
Third, we can expand the generator. Multiple generation points can provide more material than a single-block design, although larger farms require more careful fluid management.
For advanced builds, redstone and pistons can move generated blocks automatically. Some designs can then combine these mechanisms with storage or collection systems.
We should always test an advanced farm in the same Minecraft edition and version that we intend to use. Java Edition and Bedrock Edition can differ in technical behavior, particularly when redstone and complicated farm mechanics are involved.
Cobblestone Farming Problems and Common Mistakes
One of the most common mistakes is placing the water and lava incorrectly. A small change in fluid positioning can produce an unwanted block or disrupt the generator.
Another problem is exposing the player to lava. We should always design a safe standing position and use nonflammable construction materials around the farm.
We should also understand that cobblestone generation and stone generation are not identical. Minecraft’s official material explains that lava and water can produce different blocks depending on how the fluids interact.
Another important consideration is the lava supply. A basic generator can repeatedly use the same lava source for cobblestone generation, but if we want to maintain a broader lava infrastructure, dripstone and cauldrons can be useful. Minecraft’s official documentation confirms that cauldrons can hold lava, and pointed dripstone is part of Minecraft’s liquid-related mechanics.
Finally, we should avoid blindly copying a farm designed for a different version. Minecraft continues to receive updates, and technical mechanics can change. In 2026, official Java Edition releases and snapshots are still introducing and modifying game mechanics, making version-specific testing worthwhile.
Final Thoughts on Cobblestone Farming in 2026
Cobblestone farming remains one of Minecraft’s simplest and most useful renewable-resource techniques. A basic generator requires very little infrastructure, yet it can provide an enormous amount of material over the course of a Survival world.
For beginners, the best approach is to build a small manual generator, learn how water and lava interact, and prioritize safety. Once the basic design is reliable, we can expand it with multiple generation points or introduce pistons, observers, redstone and collection systems.
The real strength of cobblestone farming is its scalability. A tiny generator can support a new player, while a carefully engineered farm can supply the materials needed for enormous building projects.
In 2026, whether we are playing Survival, Skyblock, multiplayer or a technical Minecraft world, understanding cobblestone generation gives us a dependable renewable source of one of the game’s most useful basic materials.
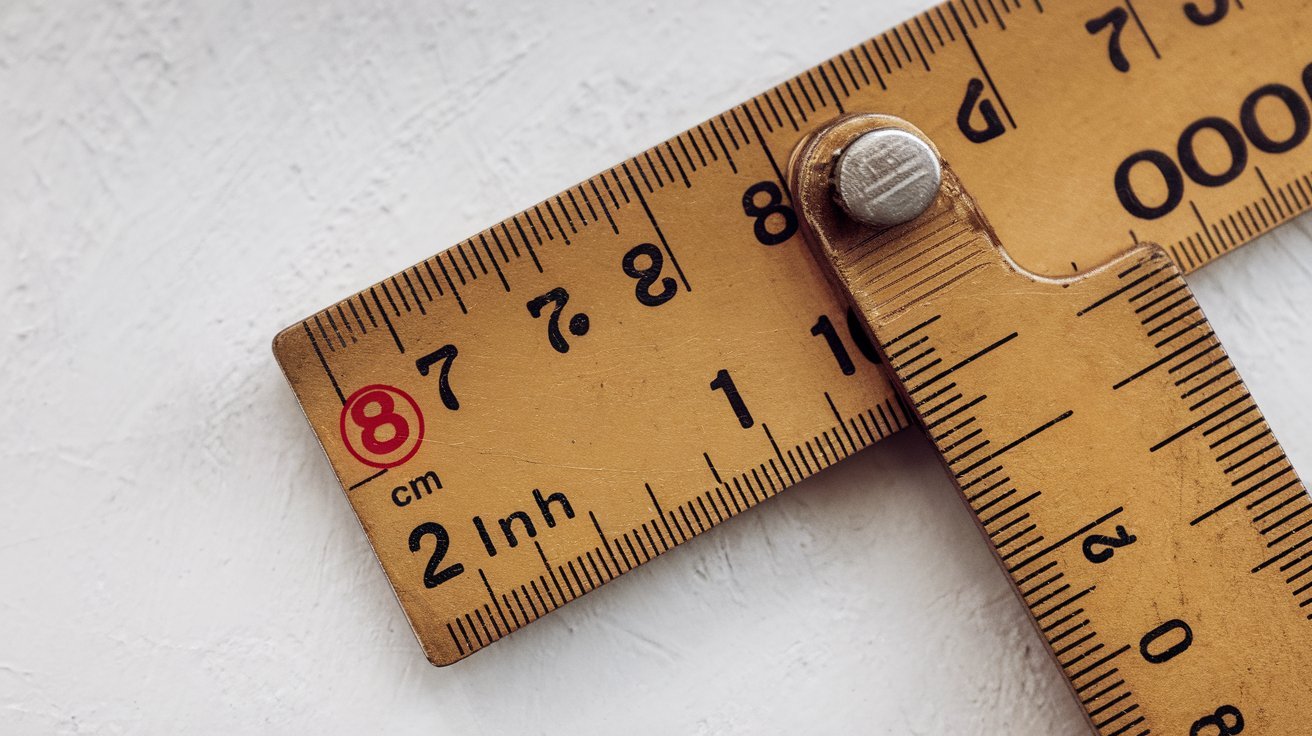
Understanding measurements can be challenging without a ruler or tape measure nearby. One of the most commonly searched size-related questions is how big is 8 inches. Whether you are shopping online, comparing electronic devices, planning a DIY project, choosing home décor, or helping children learn measurements, knowing what 8 inches looks like in real life can be extremely useful.
An 8-inch measurement appears in many everyday products, from tablets and kitchen utensils to books and household accessories. In this comprehensive 2026 guide, we will explore exactly how big 8 inches is, compare it to common objects, explain its conversions, and provide practical examples that make this measurement easy to visualize.
What Does 8 Inches Mean?
An inch is a standard unit of length commonly used in the United States and several other countries. When converted into other measurement systems, 8 inches equals:
- 20.32 centimeters
- 203.2 millimeters
- 0.67 feet
- 0.22 yards
- 0.2032 meters
While these conversions are mathematically accurate, most people understand measurements better when they are compared to familiar objects. An 8-inch measurement is considered medium-sized and is frequently found in products used every day.
For perspective, 8 inches is about two-thirds the length of a standard 12-inch ruler.
Common Everyday Examples of 8 Inches
The easiest way to answer the question how big is 8 inches is by comparing it with objects that most people recognize instantly.
Standard Chef’s Knife
One of the most common examples is an 8-inch chef’s knife blade. Professional and home cooks frequently use this knife size because it offers an ideal balance between control and cutting power.
Tablet Screens
Many compact tablets feature 8-inch displays, making them easy to carry while still offering enough screen space for reading, browsing, and entertainment.
Width of Printer Paper
A standard sheet of letter-size paper measures 8.5 inches wide, making it very close to an 8-inch measurement.
Hardcover Books
Many hardcover novels and textbooks measure approximately 8 inches in height or width.
These examples help transform an abstract measurement into something easier to picture.
How Big Is 8 Inches Compared to Household Objects?
Household items provide excellent visual references for understanding dimensions.
Pencil Length
Many standard pencils measure approximately 7.5 to 8 inches long, making them one of the easiest examples.
Television Remote
Certain TV remote controls are close to 8 inches in length.
Kitchen Spatula
Many cooking spatulas and serving utensils measure around 8 inches from handle to tip.
Small Decorative Frames
Photo frames designed for desks or shelves often have dimensions close to 8 inches.
These familiar items can help you estimate 8 inches even when measuring tools are unavailable.
How Big Is 8 Inches in Electronics?
Technology products often use inch measurements, making them useful references.
8-Inch Tablets
Compact tablets are among the most recognizable examples of an 8-inch measurement.
Popular uses include:
- Reading eBooks
- Streaming videos
- Video conferencing
- Web browsing
- Mobile gaming
Smart Displays
Several smart home displays feature screens measuring approximately 8 inches.
Digital Photo Frames
Many digital photo frames use 8-inch screens because they provide excellent visibility without taking up too much space.
Portable Monitors
Travel-friendly displays often come in the 8-inch size category.
Because electronic devices are used daily, they offer practical ways to visualize this measurement.
How to Measure 8 Inches Without a Ruler
If you do not have a ruler available, there are several simple methods for estimating 8 inches.
Use Printer Paper
A standard sheet of printer paper measures 8.5 inches wide, making it an excellent reference.
Use a Pencil
Many full-size pencils are approximately 8 inches long.
Use Your Hand
For many adults, the width of a fully extended hand measures around 8 inches from thumb tip to little finger tip.
Use a Tablet
An 8-inch tablet screen can serve as a useful visual guide.
These methods can help you estimate dimensions quickly and accurately.
Why Understanding 8 Inches Is Important
Knowing how big is 8 inches can be valuable in many situations.
Online Shopping
Product dimensions are often listed in inches. Understanding this measurement helps buyers visualize actual product size before purchasing.
Home Improvement
Whether hanging shelves, arranging furniture, or selecting storage containers, understanding dimensions improves planning.
Education
Students frequently encounter measurements in mathematics, science, and design assignments.
Crafts and DIY Projects
Many projects require accurate measurements around the 8-inch range.
Product Comparisons
Understanding common dimensions allows consumers to compare products more effectively.
This knowledge helps reduce mistakes and improves confidence when making purchasing decisions.
Interesting Facts About 8 Inches
There are several interesting ways to think about this measurement.
- It equals 20.32 centimeters.
- It is two-thirds the length of a standard ruler.
- Many chef’s knife blades measure exactly 8 inches.
- Numerous tablets use 8-inch displays.
- Several pencils are close to 8 inches long.
- Many digital photo frames feature 8-inch screens.
- It is only half an inch shorter than the width of standard office paper.
These examples demonstrate how frequently this measurement appears in daily life.
Real-Life Uses for 8-Inch Measurements
The 8-inch size category appears in numerous industries and applications.
Kitchen Equipment
Chef’s knives, serving utensils, and cutting tools commonly use 8-inch dimensions.
Electronics
Tablets, digital displays, and photo frames often feature 8-inch screens.
Office Supplies
Certain notebooks, organizers, and storage products incorporate dimensions near 8 inches.
Home Décor
Picture frames, decorative accessories, and tabletop items frequently measure around 8 inches.
Educational Materials
Books, workbooks, and learning aids often use dimensions close to this size.
Because of its versatility, 8 inches remains one of the most practical and frequently encountered measurements.
How Big Is 8 Inches Compared to Other Common Measurements?
Comparing 8 inches to other lengths can help create a clearer understanding.
- 3 inches: About the length of a house key.
- 5 inches: Similar to a compact smartphone.
- 8 inches: Comparable to a chef’s knife blade or compact tablet.
- 10 inches: Common for larger tablets and dinner plates.
- 12 inches: Equal to one full foot or a standard ruler.
These comparisons make it easier to estimate sizes when shopping or planning projects.
Conclusion
If you have ever wondered how big is 8 inches, the answer becomes much easier to understand when compared to everyday objects such as pencils, chef’s knives, tablet screens, remote controls, and standard paper. Measuring 20.32 centimeters, 8 inches is a highly practical dimension used in homes, schools, offices, kitchens, and electronic devices worldwide.
Understanding this measurement can help you estimate dimensions more accurately, compare products confidently, and make informed purchasing decisions. By using familiar objects as references, anyone can quickly recognize and visualize an 8-inch measurement in real-world situations.
Frequently Asked Questions
How many centimeters is 8 inches?
8 inches equals 20.32 centimeters.
Is 8 inches close to a foot?
A foot measures 12 inches, so 8 inches is approximately two-thirds of a foot.
What is a common example of 8 inches?
An 8-inch chef’s knife blade or an 8-inch tablet screen are common examples.
How can I estimate 8 inches without a ruler?
You can use a pencil, printer paper width, tablet screen, or hand span as a reference.
Are 8-inch tablets still popular in 2026?
Yes. Many users prefer 8-inch tablets because they offer a balance between portability and functionality.
Why is understanding 8 inches useful?
It helps with shopping, home improvement, DIY projects, education, and comparing product dimensions accurately.
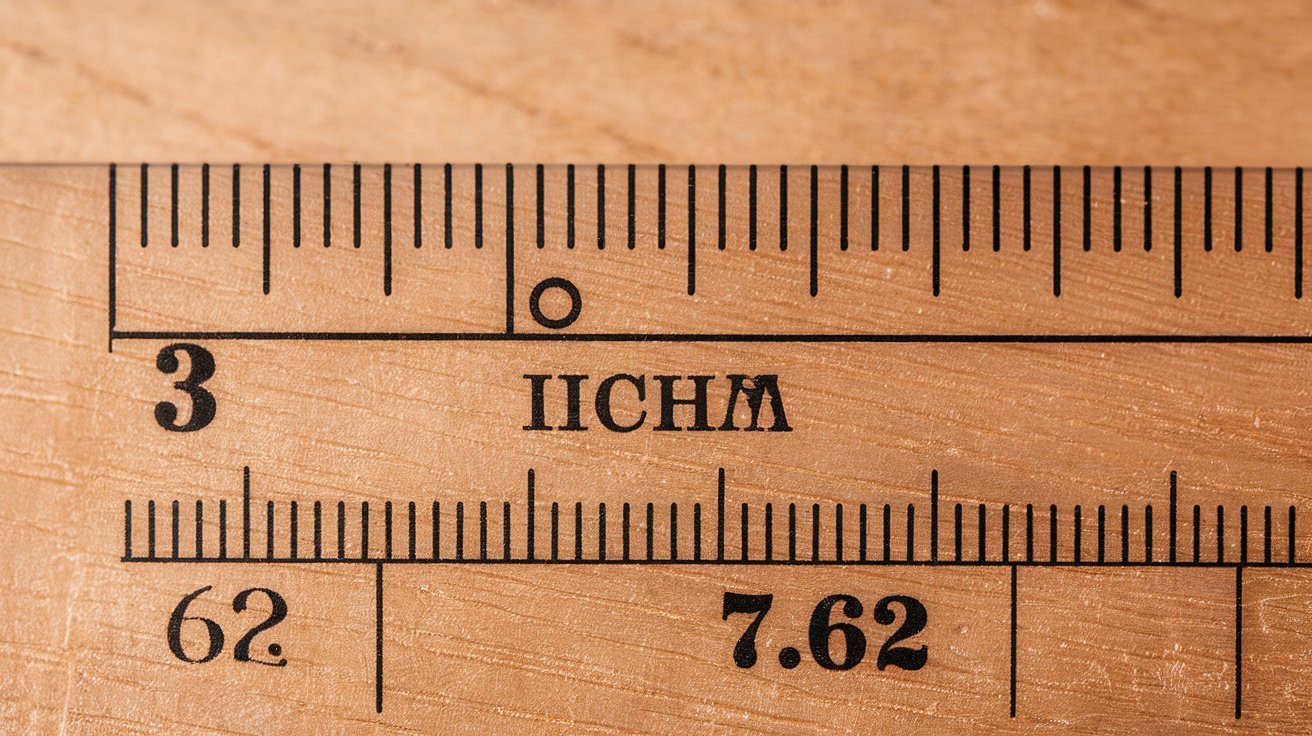
Measurements are part of everyday life, whether you are shopping online, working on a DIY project, decorating your home, selecting electronic accessories, or helping children learn basic math concepts. One common question people ask is how long is 3 inches. While 3 inches may sound like a small measurement, it appears surprisingly often in household items, office supplies, electronics, and personal accessories.
Understanding what 3 inches looks like in real life can help you estimate dimensions more accurately, compare products, and make better purchasing decisions. In this detailed 2026 guide, we will explore exactly how long 3 inches is, convert it into other measurement units, compare it with familiar objects, and provide practical examples that make this size easy to visualize.
What Does 3 Inches Mean?
An inch is a standard unit of length commonly used in the United States and several other countries. When converted into other units, 3 inches equals:
- 7.62 centimeters
- 76.2 millimeters
- 0.25 feet
- 0.083 yards
- 0.0762 meters
Although these conversions provide numerical accuracy, many people prefer visual examples because they are easier to understand. A 3-inch measurement is relatively small, but it is a very common size used in numerous products and applications.
In simple terms, 3 inches is approximately one-quarter of a standard 12-inch ruler.
Common Everyday Examples of 3 Inches
One of the easiest ways to understand how long is 3 inches is by comparing it with familiar objects.
Credit Card Width
A standard credit card measures approximately 3.37 inches across. This makes a credit card one of the closest everyday examples to a 3-inch measurement.
Golf Tee
Many golf tees are around 3 inches long, making them a useful visual reference.
Sticky Note
Certain small sticky notes are close to 3 inches wide and tall.
House Key
Many standard house keys measure between 2.5 and 3 inches in length.
These common items help provide a realistic picture of what 3 inches actually looks like.
How Long Is 3 Inches Compared to Household Objects?
Household objects can make measurements easier to understand.
Standard Ruler
A ruler measures 12 inches in total. Three inches represents exactly one-quarter of the ruler’s length.
Paper Clips
A large paper clip measures about 1.5 inches long. Two large paper clips placed end-to-end create a length close to 3 inches.
Bottle Caps
Three or four bottle caps arranged side by side often span approximately 3 inches.
USB Flash Drives
Many USB flash drives measure around 2.5 to 3 inches long, making them another useful example.
These familiar comparisons can help estimate 3 inches without using measuring tools.
How Long Is 3 Inches in Electronics?
Technology products frequently use measurements in inches, making electronics a practical reference category.
Small Smartphone Screens
Older smartphones and compact devices often featured displays measuring around 3 inches.
Smartwatches
Several smartwatch screens and wearable displays use dimensions close to 3 inches when considering overall device size.
Portable Speakers
Many compact Bluetooth speakers measure approximately 3 inches in height or width.
Computer Accessories
Small computer accessories such as USB hubs and adapters often fall within the 3-inch size range.
Because technology products are commonly used, they provide helpful examples for visualizing this measurement.
How to Measure 3 Inches Without a Ruler
There are several easy ways to estimate 3 inches when measuring tools are unavailable.
Use a Credit Card
A standard credit card measures slightly over 3 inches wide, making it an excellent reference.
Use Your Fingers
For many adults, three fingers held together measure approximately 2.5 to 3 inches across.
Use a House Key
Many house keys are close to 3 inches in length and can be used as a quick visual guide.
Use Sticky Notes
Certain small square sticky notes measure roughly 3 inches on each side.
These simple methods can help estimate dimensions in everyday situations.
Why Understanding 3 Inches Is Useful
Knowing how long is 3 inches can be surprisingly beneficial in daily life.
Online Shopping
Many product descriptions include dimensions in inches. Visualizing 3 inches helps consumers understand product sizes more accurately.
Home Improvement
Small hardware components, screws, brackets, and fixtures often use dimensions around 3 inches.
Arts and Crafts
Crafting projects frequently require measurements of 3 inches for cutting materials and creating designs.
Education
Students regularly encounter inch-based measurements in mathematics and science lessons.
Product Comparisons
Understanding common measurements improves your ability to compare products effectively.
A clear understanding of scale helps reduce mistakes and improves planning.
Interesting Facts About 3 Inches
There are many practical ways to think about this measurement.
- It equals 7.62 centimeters.
- It represents exactly one-quarter of a standard ruler.
- A credit card is slightly wider than 3 inches.
- Many house keys measure close to 3 inches long.
- Several USB flash drives are approximately 3 inches in length.
- Some golf tees are manufactured at exactly 3 inches.
- Compact electronic accessories often fall within this size range.
These examples show how often 3 inches appears in daily life.
Real-Life Uses for 3-Inch Measurements
The 3-inch measurement is widely used across multiple industries.
Hardware and Construction
Many screws, bolts, hinges, and fittings use dimensions around 3 inches.
Office Supplies
Sticky notes, paper clips, and small organizers frequently incorporate this size.
Electronics
USB devices, portable speakers, and adapters often measure approximately 3 inches.
Home Décor
Decorative accessories, small frames, and display items commonly use dimensions near 3 inches.
Educational Tools
Measurement activities and classroom materials frequently involve 3-inch examples.
Because of its versatility, this measurement remains highly relevant in everyday life.
How Long Is 3 Inches Compared to Other Common Measurements?
Comparing 3 inches with nearby measurements helps create perspective.
- 1 inch: About the width of a large coin.
- 2 inches: Similar to the width of several bottle caps.
- 3 inches: Comparable to a house key or credit card width.
- 4 inches: Similar to the width of many smartphones.
- 6 inches: Equal to half of a standard ruler.
- 12 inches: Equal to one full foot.
These comparisons make it easier to visualize size differences.
Practical Tips for Visualizing 3 Inches
If you frequently need to estimate measurements, keep these references in mind:
- Think of a standard house key.
- Use the width of a credit card.
- Imagine two large paper clips connected together.
- Compare with a small USB flash drive.
- Use three fingers placed side by side.
These quick visual references can help you estimate 3 inches almost anywhere.
Conclusion
If you have ever wondered how long is 3 inches, the answer becomes much easier to understand when compared to familiar objects such as credit cards, house keys, golf tees, sticky notes, USB drives, and paper clips. Measuring 7.62 centimeters, 3 inches is a small yet extremely common dimension that appears in homes, offices, classrooms, workshops, and electronic devices.
Understanding what 3 inches looks like can help with shopping, DIY projects, educational activities, product comparisons, and everyday measurement tasks. By using common objects as visual references, anyone can quickly estimate and recognize a 3-inch measurement with confidence.
Frequently Asked Questions
How many centimeters is 3 inches?
3 inches equals 7.62 centimeters.
What is a common example of 3 inches?
A standard house key or the width of a credit card is a good example.
Is 3 inches a quarter of a ruler?
Yes. Since a ruler measures 12 inches, 3 inches equals one-quarter of its length.
How can I estimate 3 inches without a ruler?
You can use a credit card, house key, three fingers, or a USB drive as references.
Why is understanding 3 inches useful?
It helps with shopping, crafts, home improvement, education, and estimating product dimensions.
Are many household objects around 3 inches long?
Yes. Keys, flash drives, golf tees, and various office supplies often measure close to 3 inches.

You Are Special: Understanding Your Unique Value, Purpose, and Identity in 2026

Ramps for Sheds: The Complete Guide to Choosing and Building the Right Shed Ramp in 2026

Laser Rust Remover: Complete Guide to Laser Rust Removal in 2026

Almawadahit.com Blog: A Guide to Modern Online Blogging and Digital Content in 2026

Shiny or Shiny: The Complete 2026 Guide to Creating Stunning AI Images with ChatGPT, Picfont, and Image Compression Tools

Tips for First-Time Chauffeur Service Users
 Blog2 months ago
Almawadahit.com Blog: A Guide to Modern Online Blogging and Digital Content in 2026
- Blog2 months ago
Shiny or Shiny: The Complete 2026 Guide to Creating Stunning AI Images with ChatGPT, Picfont, and Image Compression Tools
- Business2 months ago
Tips for First-Time Chauffeur Service Users
- Celebrity2 months ago
Erin Wagner: Biography, Career, Achievements, and Lasting Influence
- Business2 months ago
Voozon: Complete Guide, Meaning, Features, Benefits, and Everything You Need to Know
- Celebrity2 months ago
Solluminati Age (2026): Biography, Real Name, Birthday, Career, Height, and Life Story
- Blog2 months ago
www.quotela.net: The Complete 2026 Guide to Quotes, Inspiration, and Creative Content
- Celebrity2 months ago
Luciana Pedraza: A Complete Biography of the Argentine Actress, Director, and Philanthropist