
Blog
How to Use Keurig: The Complete Beginner’s Guide for Perfect Coffee in 2026

A Keurig coffee maker has become one of the most convenient ways to enjoy fresh coffee, tea, hot chocolate, and specialty beverages at home or in the office. Its simple design and fast brewing process make it a favorite choice for millions of users worldwide. Whether you have purchased your first machine or want to improve your brewing experience, understanding how to use Keurig properly can help you get the best flavor and performance from your brewer.
Modern Keurig machines are designed to brew a fresh cup in about a minute using convenient K-Cup pods. Most models offer multiple cup sizes, removable water reservoirs, energy-saving features, and compatibility with reusable coffee filters. With the right setup and maintenance, a Keurig brewer can deliver consistent, delicious beverages every day.
Getting Your Keurig Ready for First Use
Before brewing your first cup, it is important to set up the machine correctly.
Start by removing all packaging materials and placing the Keurig on a stable surface near an electrical outlet. Fill the water reservoir with fresh water and attach it securely to the brewer. Many Keurig models recommend avoiding distilled water because it may affect brewing performance. Place a large mug on the drip tray before powering on the machine.
For new machines, perform a cleansing brew without inserting a K-Cup pod. This process flushes the internal system and prepares the brewer for normal operation. Once completed, your Keurig is ready to make coffee.
How to Brew Coffee with a Keurig
Brewing coffee with a Keurig is quick and straightforward.
Step 1: Fill the Water Reservoir
Ensure the water reservoir contains enough fresh water for the desired cup size. Most Keurig machines have clear water level indicators that make monitoring easy.
Step 2: Place Your Mug
Position a coffee mug on the drip tray directly beneath the brew spout. If you are using a travel mug, remove the drip tray if necessary to create additional clearance.
Step 3: Insert the K-Cup Pod
Lift the handle on top of the brewer and place a K-Cup pod into the pod holder. Do not remove the foil lid from the pod. Lower the handle completely until it locks into place.
Step 4: Select Brew Size
Most Keurig brewers allow users to choose between several cup sizes such as 6 oz, 8 oz, 10 oz, or 12 oz depending on the model. Select your preferred size using the control panel.
Step 5: Start Brewing
Press the brew button and wait approximately one minute. The machine will heat the water and force it through the K-Cup pod, creating a fresh cup of coffee. Brewing is complete when the indicator lights stop flashing.
Step 6: Enjoy Your Beverage
Carefully remove the used K-Cup pod after brewing and dispose of it properly. Your coffee is now ready to enjoy.
Choosing the Right Brew Size
One of the most useful Keurig features is the ability to customize beverage size.
Smaller cup sizes generally produce stronger coffee because less water passes through the coffee grounds. Larger cup sizes create a milder flavor.
Common brew sizes include:
- 6 oz – Strong and bold coffee
- 8 oz – Balanced flavor
- 10 oz – Smooth and lighter taste
- 12 oz – Larger serving with milder strength
Experimenting with different sizes can help you discover the perfect flavor profile for your favorite K-Cup pods.
Using a Reusable Coffee Filter
Many Keurig models support reusable coffee filters, allowing users to brew their favorite ground coffee instead of purchasing K-Cups.
Benefits include:
- Lower long-term costs
- Reduced waste
- More coffee variety
- Custom coffee strength
To use a reusable filter:
- Fill the filter basket with ground coffee.
- Insert the reusable filter into the brewer.
- Select your preferred cup size.
- Start the brewing cycle.
Reusable filters provide excellent flexibility for coffee enthusiasts who enjoy experimenting with different blends and roasts.
Making Iced Coffee with a Keurig
Many newer Keurig models include a dedicated Brew Over Ice feature.
To make iced coffee:
- Fill a tumbler with ice.
- Insert your preferred coffee pod.
- Place the tumbler beneath the brewer.
- Select the Brew Over Ice option.
- Allow the brewing cycle to complete.
The machine adjusts brewing parameters to create a rich flavor that remains enjoyable after the ice melts. Some models specifically include settings designed for this purpose.
Cleaning and Maintaining Your Keurig
Proper maintenance is essential for consistent brewing quality and machine longevity.
Clean the Water Reservoir
Wash the reservoir regularly using warm water and mild soap. This prevents residue buildup and helps maintain fresh-tasting beverages.
Empty the Drip Tray
Remove excess water and coffee spills frequently to keep the machine clean.
Clean the Needles
Coffee grounds can occasionally clog the pod holder needles. Cleaning these areas improves water flow and brewing consistency.
Descale the Brewer
Mineral deposits naturally build up inside the machine over time. Keurig recommends descaling every three to six months to maintain optimal performance and beverage quality.
Common Keurig Problems and Solutions
Even reliable coffee makers occasionally experience issues.
Coffee Tastes Weak
- Use a smaller brew size.
- Try a darker roast pod.
- Clean the brewer thoroughly.
Machine Won’t Brew
- Check the water reservoir.
- Ensure the K-Cup pod is inserted correctly.
- Restart the brewer.
Slow Brewing
- Perform a descaling cycle.
- Clean the needles and water lines.
Leaking Water
- Verify that the reservoir is seated properly.
- Check seals and connections.
- Inspect the drip tray for overflow.
Regular maintenance prevents most common Keurig problems and ensures dependable operation.
Tips for the Best Keurig Coffee Experience
To maximize flavor and performance:
- Use fresh filtered water.
- Store K-Cups in a cool, dry place.
- Clean the brewer regularly.
- Descale every few months.
- Experiment with different coffee brands and roast levels.
- Choose the cup size that matches your taste preference.
These simple habits can significantly improve coffee quality and extend the lifespan of your machine.
Conclusion
Learning how to use Keurig is simple, but mastering the process can greatly enhance your daily coffee experience. From setting up the brewer and selecting the right K-Cup pod to maintaining the machine through regular cleaning and descaling, every step contributes to better flavor and performance.
A properly maintained Keurig coffee maker provides fast, convenient, and consistent brewing for coffee lovers of all experience levels. By following the best practices outlined in this guide, you can enjoy rich, flavorful beverages and reliable performance throughout 2026 and beyond.

The 2026 Explorer continues to position itself as a versatile three-row SUV designed for families, daily drivers, road-trip enthusiasts, and drivers who want stronger capability without moving into a full-size SUV. For the 2026 model year, Ford expands the Explorer lineup with the new Tremor series while continuing to offer familiar Active, ST-Line, ST, and Platinum models. The result is an SUV range that covers practical everyday transportation, sporty driving, premium comfort, and more serious off-road use.
The 2026 Explorer combines EcoBoost power, three-row seating, available Intelligent 4WD, advanced driver-assistance technology, connected features, and up to 5,000 pounds of towing capacity. Ford also adds equipment and technology updates for 2026, making this model year particularly interesting for buyers comparing midsize SUVs.
What Is New for the 2026 Explorer?
One of the most important changes for 2026 is the introduction of the Explorer Tremor. Ford positions the Tremor as the more adventure-focused member of the lineup, giving buyers an option specifically designed around off-road capability and rugged styling. The 2026 lineup also introduces an Active 100A base series, expanding the range for shoppers looking for a simpler entry point.
Ford also makes a panoramic fixed-glass roof with power shade available across the Explorer range, with the Active 100A being the exception according to Ford’s current U.S. specifications. A new Marsh Gray exterior color is available on selected trims, while the ST gains an available second-row bench-seat configuration.
Technology also receives attention. The Ford Connectivity Package becomes standard, a 5G modem replaces FordPass Connect, and longer connectivity subscription options are available. Ford has also expanded BlueCruise availability and introduced a seven-year BlueCruise subscription option on selected models.
2026 Explorer Engine Options and Performance
The 2026 Ford Explorer offers two primary EcoBoost engine choices. The 2.3-liter EcoBoost four-cylinder produces 300 horsepower and 310 lb-ft of torque and is available across much of the lineup. The available 3.0-liter EcoBoost V6 produces 385 horsepower and 415 lb-ft of torque according to Ford’s current 2026 specifications.
The four-cylinder engine is a particularly important part of the Explorer formula because it combines strong output with the practicality expected from a three-row SUV. Drivers seeking additional performance can move to the V6-equipped configurations, particularly the ST and certain Tremor configurations.
The Explorer also provides multiple selectable drive modes. Depending on configuration, drivers can choose from modes such as Normal, Eco, Sport, Tow/Haul, Slippery, Trail, or Off-Road. These settings allow the vehicle’s behavior to be adjusted according to road and terrain conditions.
Towing is another major strength. Ford lists a 5,000-pound maximum towing capacity, with the Class III Tow Package included across the Explorer lineup. The package includes a Class III hitch receiver, seven-wire harness, and four- and seven-pin trailer connectors.
Explorer Tremor: The Adventure-Focused 2026 Model
The biggest addition to the 2026 lineup is the Explorer Tremor. This model gives buyers a factory-built option for drivers who want a more rugged appearance and greater focus on off-pavement driving.
The Tremor uses distinctive 18-inch high-gloss Ebony Black-painted aluminum wheels with Electric Spice accents. It is also available with the 3.0-liter EcoBoost V6, while Intelligent 4WD is standard with the V6 Tremor configuration.
For buyers who regularly travel beyond paved roads, the Tremor can make more sense than a conventional street-oriented trim. At the same time, its three-row SUV layout means it remains practical for everyday transportation.
Ford also offers a Tremor Convenience Package with features including ambient lighting, an auto-dimming rearview mirror, upgraded side mirrors, rain-sensing wipers, driver-seat memory, and PowerFold third-row seating. A Tremor Ultimate Package is also available with the 3.0-liter engine and adds equipment such as a premium B&O sound system, power-folding mirrors, panoramic glass roof, and multicontour front seats with Active Motion.
2026 Explorer Interior, Seating, and Cargo Space
Inside, the 2026 Explorer is designed around flexibility. Ford offers seating for up to seven passengers, depending on configuration, while some versions use second-row captain’s chairs and provide six-passenger capacity. All Explorer models feature three rows.
Cargo capacity is another advantage. Ford lists up to 85.8 cubic feet of maximum cargo space on applicable configurations. With all three rows in use, the Explorer still provides 16.3 cubic feet of cargo volume behind the third row according to Ford’s specifications.
The cabin can also be equipped with multicontour massaging leather-trimmed seats, ambient lighting, and available Bang & Olufsen audio equipment. Depending on configuration, buyers can choose a 10-speaker B&O system or a more powerful 980-watt, 14-speaker setup.
This combination makes the Explorer suitable for both everyday family transportation and longer road trips. The available seating configurations also allow buyers to prioritize passenger capacity or second-row comfort.
Technology, Connectivity, and Driver Assistance
Technology is one of the strongest areas of the modern Explorer. Ford lists a 13.2-inch landscape touchscreen, a 12.3-inch digital instrument cluster, Google built-in applications in applicable markets, and Ford Co-Pilot360 driver-assistance technology.
The 2026 model year also brings improvements to connected technology. The standard Ford Connectivity Package includes one year of service, while a 5G modem replaces FordPass Connect. Buyers can also purchase longer connectivity plans.
Another major feature is Ford BlueCruise, Ford’s available hands-free highway driving technology. For equipped vehicles, the 2026 system includes Automatic Lane Change, allowing the system to assist with lane changes while monitoring surrounding traffic.
These technologies are designed to make long-distance driving less demanding while still requiring the driver to remain attentive and follow the system’s operating requirements.
2026 Explorer Trims and Which One May Fit Best
The 2026 Explorer lineup includes Active 100A, Active, ST-Line, ST, Platinum, and Tremor series in the U.S. order guide. Each trim targets a different type of buyer.
The Active is oriented toward everyday versatility and represents a practical choice for families. The ST-Line adds a sportier appearance and equipment, making it attractive to buyers who want more visual character without necessarily choosing the highest-performance ST.
The ST is the performance-oriented choice, particularly when paired with the 3.0-liter EcoBoost V6. The Platinum emphasizes premium comfort, technology, and upscale interior equipment. Meanwhile, the Tremor is aimed at buyers who place greater importance on adventure and off-road capability.
This broad range is one of the Explorer’s biggest strengths because buyers do not have to choose between a basic family SUV and a highly expensive luxury model. The lineup provides several distinct approaches to the same three-row platform.
Is the 2026 Explorer Worth Considering?
The 2026 Explorer is a strong all-around option for drivers who want a midsize three-row SUV with substantial power, useful towing capability, flexible seating, modern technology, and multiple trim personalities. Its 5,000-pound towing capacity, available Intelligent 4WD, two EcoBoost engines, and multiple drive modes give it useful capability beyond ordinary city driving.
The addition of the Tremor makes the 2026 lineup even more appealing to adventure-oriented buyers, while the Active, ST-Line, ST, and Platinum models continue to cover practical, sporty, performance, and premium priorities.
For families, the available seven-passenger seating and generous cargo capacity are major advantages. For technology-focused buyers, the large touchscreen, connectivity features, and available BlueCruise provide additional appeal. For drivers who want performance, the available V6 delivers 385 horsepower and 415 lb-ft of torque.
Overall, the 2026 Ford Explorer brings together space, performance, towing, technology, comfort, and versatility in one broad lineup. With the new Tremor joining the range and several meaningful equipment updates arriving for the model year, the 2026 Explorer is one of Ford’s most flexible choices for buyers seeking a capable three-row SUV.

Get blog thriftyevents.net is a useful search topic for readers who want to discover affordable event-planning ideas, practical budgeting advice, and creative ways to organize memorable occasions. Whether we are arranging a birthday party, wedding, corporate gathering, community event, or family celebration, the right planning resources can help us make better decisions without unnecessary spending. In 2026, the most effective approach is to combine realistic budgeting, creative problem-solving, and careful preparation.
The official ThriftyEvents website presents itself as a resource for budget-friendly event planning, with content covering budgeting tips, DIY ideas, and practical event-planning guidance. Its published articles discuss venues, catering, decorations, equipment, and ways to reduce costs while maintaining a positive guest experience.
What Is Get Blog ThriftyEvents.net?
The phrase “get blog thriftyevents.net” generally refers to finding and exploring the content published on ThriftyEvents.net. The website’s main focus is helping readers plan events with a sensible budget, while its blog content provides ideas, checklists, and practical strategies for different occasions.
The site includes an Event Planning section, along with Budgeting Tips and DIY Ideas. These categories make it easier for readers to find information related to their specific planning needs. For example, someone organizing a wedding may look for decoration ideas and budgeting guidance, while a business arranging a corporate event may be more interested in venue selection, catering, and equipment costs.
We should treat online articles as planning resources rather than guarantees. Prices, availability, vendor services, and event requirements can change. Before making a booking or payment, we should confirm important details directly with the relevant provider.
How We Can Use ThriftyEvents.net for Event Planning
The most effective way to use an event-planning blog is to begin with a clear objective. Before collecting ideas, we should decide what kind of event we are organizing, how many guests may attend, and what experience we want to create.
A practical process includes:
- Define the event purpose before making purchases.
- Estimate the guest count as accurately as possible.
- Set a realistic budget before comparing suppliers.
- Identify the most important priorities for the occasion.
- Research suitable options for venues, food, decorations, and activities.
- Confirm current details before making commitments.
This approach helps us avoid spending money on attractive ideas that do not suit the event. It also makes it easier to identify where we can save and where spending a little more may improve the experience.
For example, a small family gathering may benefit from a comfortable home setting and homemade food, while a corporate event may require reliable equipment and professional catering. The best budget reflects the purpose of the occasion.
Budget-Friendly Event Ideas Worth Exploring
ThriftyEvents.net’s published content emphasizes the value of smart planning and creative alternatives. Its guides discuss ways to organize celebrations while controlling costs, including practical approaches to venues, decorations, food, and event logistics.
We can apply these principles to several common event types:
Birthday celebrations: A simple theme, homemade decorations, and a carefully planned menu can create a welcoming atmosphere without requiring expensive entertainment.
Weddings: Couples can prioritize meaningful features such as the ceremony, food, or photography while choosing more economical options for less important expenses.
Corporate events: A clear objective, realistic attendee estimate, and comparison of venue and catering options can help organizations avoid unnecessary spending.
Community gatherings: Shared resources, local suppliers, and volunteer-supported activities may help create a successful event while keeping costs manageable.
The strongest approach is not necessarily to choose the cheapest option in every category. It is to select the option that provides the greatest value for the people attending.
How to Build a Realistic Event Budget
A clear budget is one of the most important tools for successful event planning. We should begin by listing the main categories of spending and estimating the likely cost of each. ThriftyEvents.net’s published budgeting content discusses connecting expenses to goals and accounting for both fixed and variable costs.
| Budget Category | Important Considerations |
|---|---|
| Venue | Rental fee, deposits, equipment, and additional charges |
| Food and beverages | Menu, portions, catering, and dietary requirements |
| Decorations | Materials, rentals, reusable items, and setup |
| Entertainment | Activities, music, performers, or equipment |
| Invitations | Printing, digital invitations, and communication |
| Transportation | Travel, parking, and delivery costs |
| Contingency | Unexpected expenses and last-minute changes |
After creating the budget, we can compare suppliers and identify areas where savings are possible. We should also keep a contingency reserve rather than spending every available dollar before the event begins.
A realistic budget does not mean choosing the lowest price in every category. It means understanding the total cost and making decisions that provide the best overall value.
Affordable Venues, Decorations, and Food
Venue and supplier decisions can significantly affect the total cost of an event. We should compare more than the advertised price and consider what is included in each package. A venue that provides tables, chairs, lighting, or basic sound equipment may offer better value than a cheaper space requiring several additional rentals.
Decorations can also be managed creatively. Instead of purchasing large quantities of unrelated items, we can choose a simple color palette, consistent theme, and a few focal points. Reusable table runners, glass containers, handmade signs, and carefully arranged lighting can create a polished appearance without excessive spending.
Food planning is equally important. For informal gatherings, a buffet, shared meal, or finger-food menu may be more economical than a formal plated service. Seasonal ingredients and locally available products can also help us manage expenses.
We should estimate attendance accurately, plan portions carefully, and avoid purchasing more food or beverages than necessary. Good planning reduces waste while protecting the guest experience.
DIY Ideas and Sustainable Event Planning in 2026
DIY decorations can be an effective way to personalize an event while reducing expenses. ThriftyEvents.net’s published decoration guidance discusses using a consistent color palette, a few focal areas, and versatile materials to create a stylish appearance without excessive spending.
We can use reusable table decorations, handmade signs, fabric runners, glass containers, and simple lighting to create a cohesive atmosphere. Instead of decorating every part of a venue, we can focus on the entrance, dining area, and one memorable display.
Sustainability can also support affordability. The website’s published sustainability guide highlights reducing single-use items, choosing local food, and planning waste more carefully.
Practical steps include:
- Use reusable decorations whenever possible.
- Choose seasonal materials for lower-cost arrangements.
- Avoid excessive packaging when purchasing supplies.
- Plan food quantities carefully to reduce waste.
- Donate suitable leftovers where appropriate.
- Recycle or repurpose materials after the event.
These choices can help us create a more responsible celebration while keeping the budget under control.
Final Thoughts on Get Blog ThriftyEvents.net
The get blog thriftyevents.net topic is valuable for anyone seeking practical event inspiration, budgeting advice, and creative ways to organize celebrations in 2026. The website’s published content provides ideas for planning different occasions, managing expenses, and using DIY approaches to create memorable experiences.
By starting with a clear goal, setting a realistic budget, comparing options, and focusing on what guests will genuinely appreciate, we can create events that feel thoughtful and well organized. Affordable event planning is not about removing everything enjoyable; it is about making better decisions with the resources available.
Frequently Asked Questions
What does “get blog thriftyevents.net” mean?
It generally refers to finding and exploring the published blog content on ThriftyEvents.net, including budgeting advice, DIY ideas, and practical event-planning guidance.
What types of events can we plan with budget-friendly ideas?
We can use these principles for birthdays, weddings, corporate gatherings, community events, and family celebrations.
How can we reduce event costs without sacrificing quality?
We can prioritize important expenses, compare suppliers, use reusable decorations, and choose activities that provide meaningful guest experiences.
Why is a contingency fund important?
A contingency fund helps us manage unexpected expenses, such as additional supplies, delivery charges, or last-minute changes.
Are DIY decorations suitable for every event?
Yes, when planned appropriately. We should choose materials and designs that match the event’s style, available time, and practical requirements.
Should we verify event information before booking?
Yes. We should confirm current prices, availability, venue details, and supplier terms before making commitments.
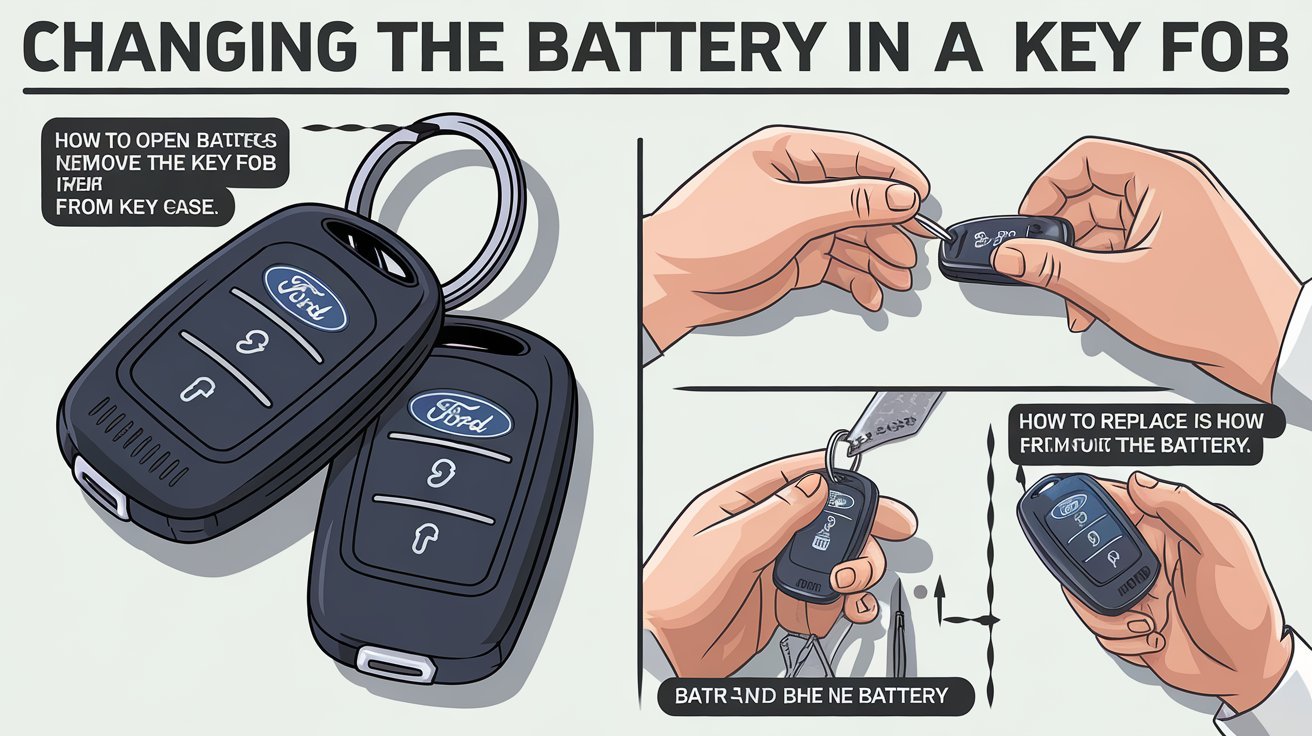
Knowing how to change the battery in a Ford key fob can save time when the remote begins showing signs of a weak battery. A Ford key fob relies on a small coin-cell battery to power its buttons and wireless functions. When the battery becomes weak, the remote may work inconsistently, require repeated button presses, or display a low-battery warning in vehicles equipped with that feature.
The exact battery and opening procedure depend on the Ford key-fob design and vehicle model year. Ford has used several key-fob styles, so we should identify the correct replacement battery and follow the instructions for the specific fob rather than assuming every Ford remote opens in exactly the same way.
The process is generally simple: open the fob, remove the old battery, install the replacement in the correct orientation, and reassemble the housing. In most cases, replacing the battery does not require reprogramming the key.
What Battery Does a Ford Key Fob Use?
The first step is determining the correct battery. Ford key fobs can use different coin-cell batteries depending on the vehicle and remote design. Common examples include CR2032 and CR2450, but we should not assume either battery is correct without checking the specific key.
Ford’s owner information provides model-specific instructions and battery specifications through its online owner manuals. For example, Ford documentation for some remote-control designs specifies a CR2032 3-volt lithium battery, while other Ford keys can use different battery sizes.
We can identify the required battery by checking the existing battery, consulting the vehicle’s owner’s manual, or using Ford’s official support resources. The number printed on the old coin cell should match the replacement.
When purchasing a replacement, we should select a reputable 3-volt lithium coin-cell battery with the exact size specified for the key. A battery that physically looks similar may still be the wrong type.
How to Open a Ford Key Fob
Once we have the correct battery, we can prepare a small, non-damaging tool if the particular fob requires one. Many Ford key fobs are designed with a slot, notch, or seam that allows the housing to be separated.
For traditional Ford remote-control designs, we generally begin by removing the mechanical key if the fob contains one. Ford instructions for several models describe using the key or another suitable tool to access the battery compartment.
We should inspect the housing carefully before applying pressure. The goal is to separate the two halves without damaging the plastic clips. Excessive force or using a sharp metal object aggressively can scratch the housing or damage internal components.
If the fob has a removable physical key, we should keep it somewhere secure while the housing is open. The electronic circuit board should also remain protected from unnecessary contact.
How Do You Change the Battery in a Ford Key Fob?
After opening the housing, we can remove the old battery from its retaining position. The battery compartment may contain a small clip or holder designed to keep the coin cell securely in place.
We should note the positive (+) and negative (–) orientation before removing the old battery. Battery orientation varies by key design, so the correct installation direction should be confirmed from the markings inside the fob or the owner’s manual.
The basic procedure is:
- Open the key fob carefully.
- Locate the existing coin-cell battery.
- Check its printed battery number and orientation.
- Carefully release the battery from its holder.
- Insert the new battery in the same orientation.
- Confirm that the battery is seated securely.
- Reconnect the two halves of the key-fob housing.
- Reinstall the mechanical key if applicable.
- Test the remote buttons from close range.
Ford’s official guidance for applicable key fobs instructs owners to install the replacement battery with the positive side facing in the specified direction and then reassemble the remote. Because Ford uses multiple key designs, the exact orientation should be checked against the instructions for the particular vehicle.
How to Replace the Battery Without Damaging the Key Fob
A key fob contains electronic components that should be handled carefully. We should work on a clean, dry surface and avoid touching the circuit board unnecessarily.
When removing a coin-cell battery, we should not force it against the plastic housing. If a retaining tab holds the battery in place, gently release the battery according to the design of the holder.
We should also avoid bending the metal contacts inside the battery compartment. These contacts provide the electrical connection between the battery and the remote’s circuitry. If they become bent or damaged, simply installing a new battery may not solve the problem.
The replacement battery should sit flat and securely. If it moves around inside the compartment, the fob may work intermittently.
When closing the housing, we should align the edges before applying gentle, even pressure. The two halves should snap together without requiring excessive force.
How to Know When a Ford Key Fob Battery Needs Replacing
A weak key-fob battery can produce several warning signs. The most obvious is that the remote works only when we are closer to the vehicle than usual. The buttons may also require multiple presses.
Depending on the Ford model, the vehicle can display a message indicating that the key battery is low. Ford’s owner’s manuals provide model-specific explanations for these warnings.
Some vehicles may continue operating normally while the remote battery gradually becomes weaker. However, replacing the battery when these symptoms appear is preferable to waiting until the remote stops communicating with the vehicle.
It is also useful to remember that a key-fob problem is not always caused by the battery. If a fresh, correctly installed battery does not restore normal operation, the issue could involve the remote itself, physical damage, poor battery contact, or another vehicle-related problem.
Does Changing the Ford Key Fob Battery Require Reprogramming?
For many Ford vehicles, changing the coin-cell battery does not erase the key’s programming. The electronic key remains associated with the vehicle after the battery is replaced.
This is an important distinction between battery replacement and key programming. Programming is a separate procedure used when adding or replacing a key or remote, while replacing the existing battery normally only restores electrical power to the existing remote.
If the key fob does not work after a battery replacement, we should first check three things: battery type, battery orientation, and battery seating. We should also confirm that the fob housing has been closed correctly.
If the remote still does not function, the vehicle’s owner’s manual or Ford support information should be consulted for the specific model. A dealership or qualified automotive locksmith may be appropriate if the remote requires programming or appears to have an electronic fault.
Ford Key Fob Battery Replacement Safety and Disposal
Coin-cell batteries should be handled responsibly. They are small and can be hazardous if swallowed, particularly by children and pets. The old battery should therefore be kept away from young children and animals during the replacement process.
We should never attempt to recharge, crush, puncture, burn, or otherwise modify a disposable lithium coin-cell battery. A damaged battery should be handled according to local battery-disposal guidance.
After replacement, the old battery should be taken to an appropriate battery-recycling or household hazardous-waste collection point where available. Local disposal requirements can vary.
We should also keep the replacement battery in its original packaging until it is needed and avoid carrying loose coin cells alongside metal objects that could bridge the battery terminals.
What to Do If the New Ford Key Fob Battery Does Not Work
If the remote remains unresponsive after installing a new battery, we should not immediately assume that the key needs to be replaced.
First, confirm that the battery number is correct for the particular Ford key. Next, remove and reinstall it while checking the positive and negative orientation. The battery should make firm contact with the holder.
We should then inspect the housing to make sure it has completely closed and that no internal component has shifted.
If the remote still fails, testing the battery with an appropriate battery tester can help determine whether the replacement itself is functional. We should also consider whether the key has suffered water exposure, impact damage, or worn buttons.
If another properly functioning key works with the vehicle while the newly serviced remote does not, the problem is more likely to be associated with the individual key fob. At that point, professional diagnosis may be appropriate.
Final Guide to Changing a Ford Key Fob Battery
The answer to “How do you change the battery in a Ford key fob?” is relatively simple, but the exact procedure depends on the key design. We begin by identifying the correct coin-cell battery, carefully open the housing, remove the old battery, install the new one in the correct orientation, and securely close the fob.
The most important details are using the exact battery specified for the key, observing the correct polarity, protecting the internal electronics, and avoiding excessive force when opening or closing the housing.
In most situations, a normal battery replacement does not require reprogramming the existing key. If the remote continues to malfunction after a correctly installed new battery, we should investigate the possibility of damaged contacts, a faulty remote, or another issue rather than repeatedly replacing batteries.
Because Ford has produced numerous key-fob designs across its vehicle range, the vehicle-specific owner’s manual remains the most reliable reference for the exact battery type and replacement procedure. Ford’s official support center also provides model-specific information for many vehicles.


 Business2 months ago
Tips for First-Time Chauffeur Service Users
- Blog2 months ago
Shiny or Shiny: The Complete 2026 Guide to Creating Stunning AI Images with ChatGPT, Picfont, and Image Compression Tools
- Celebrity2 months ago
Erin Wagner: Biography, Career, Achievements, and Lasting Influence
- Blog2 months ago
Almawadahit.com Blog: A Guide to Modern Online Blogging and Digital Content in 2026
- Business2 months ago
Voozon: Complete Guide, Meaning, Features, Benefits, and Everything You Need to Know
- Celebrity2 months ago
Solluminati Age (2026): Biography, Real Name, Birthday, Career, Height, and Life Story
- Business2 months ago
Totaling vs Totalling: The Complete 2026 Guide to the Correct Spelling and Usage
- Celebrity2 months ago
Luciana Pedraza: A Complete Biography of the Argentine Actress, Director, and Philanthropist